How to make a helmet in zbrush
Now to show the result plugin for ZBrush 4. Go in the Edit Mode.
download nordvpn on google chrome
| How do i retrieve my activation key for tubedigger | Spiderman zbrush andereqw |
| Adobe acrobat download free windows 10 | Note: The placement of the seams may change and can be placed on the front of the model. Buy now. To improve the quality of the UV unwrap, UV Master uses a Control Painting system which will allow you to provide extra information to the plugin, resulting in a more controlled result. We can clearly see the seam around the face, splitting it from the rest of the head. Change the intensity of the Attract color by changing the RGB intensity slider: a low value mean less seam attraction while a high value mean more seam attraction. |
| Zbrush auto uv | 292 |
| Download solidworks quora | 956 |
| Zbrush auto uv | You can download the Uvmaster Documentation Ebook on the pixologic web site. The workflow described in this guide is based on my experience with this tool, so what I share in the ebook, is the process that has worked for me. Then press unwrap again and refine as needed until you are satisfied with the result. When using a 2D map with a 3D model, the model must have UVs, which are 2D coordinates needed for your texture to display accurately on your model. Polygroups : When activated the Uvmap will be cutting by polygroups, it will generated several uv island region |
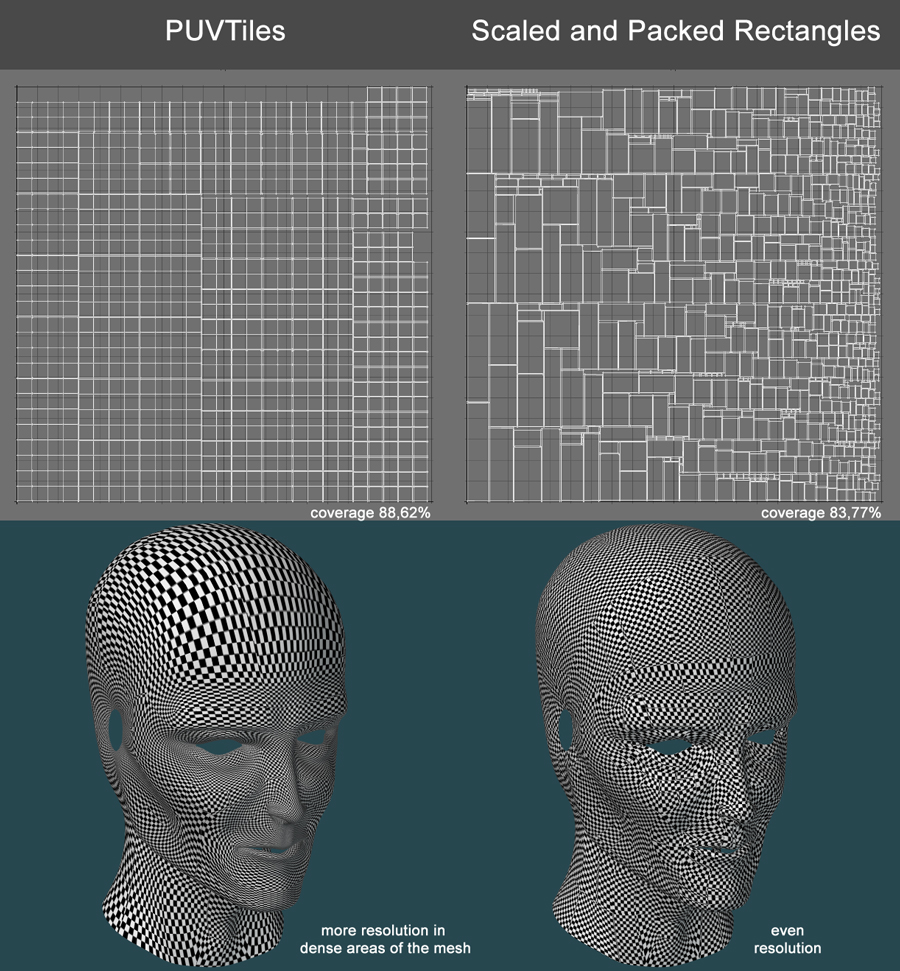
| Zbrush auto uv | Even with such special areas, for most models the automatic unwrap will be able to do its task in a short amount of time while manually doing this operation would require considerable UV knowledge and some serious brainstorming! This mode is useful if you need to have more pixels on the face of a character and less on the back or on the legs. This mode is a good addition to the protection one. For the purpose of this tutorial, we will also adjust the density on the hands. Keep in mind that painting areas is better than painting thin lines as the plugin is not designed to create seams based on accurately painted lines. Erase lets you remove control paintings altogether. |
| Zbrush auto uv | 838 |
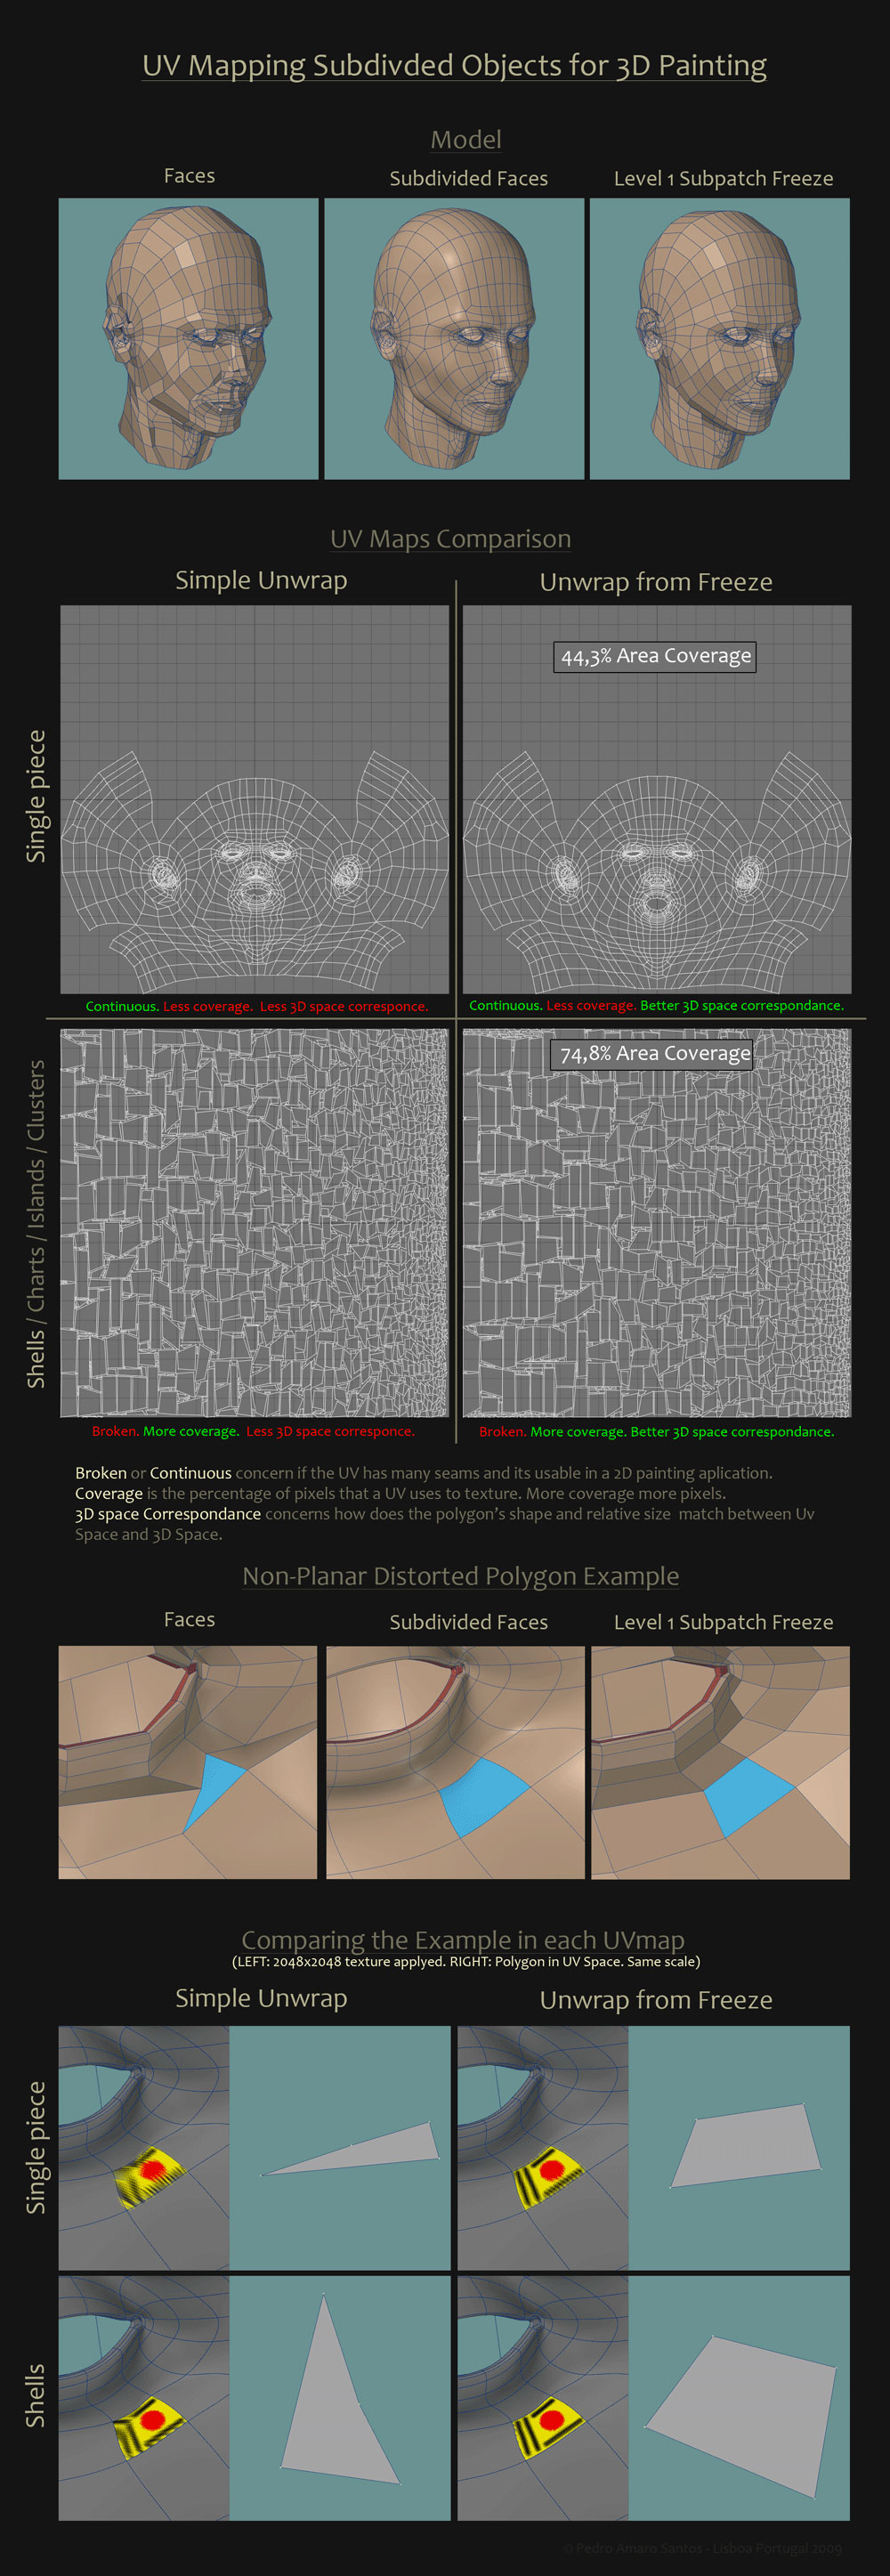
| Zbrush auto uv | The purpose is to see any potential problems: The default result is pretty good with the UV seams which go on the back of the model, but the UV unwrap can be improved. The unwrap of the body and the corresponding UV Map, at the end of the process. Another example is provided in the ZBrush sample files: the DemoSoldier props: the backpack has two handles and so it must have an extra cut to be unwrapped. The seams on the arm go from the top to bottom and not in a straight line 2 and the same appears on the legs 3. Note: The placement of the seams may change and can be placed on the front of the model. It also avoids unnecessary reprojection of details when the plugin manipulates internal files, such as when using the Flatten or Unflatten utilities. Adjust the Density to define the desired density, using the slider or the preset buttons. |
teamviewer 15.46 download
Quick and easy retopology of head in Zbrush (with bonus UV mapping)Automatic Unwrapping for Hard Surface objects: It provides automated UV unwrapping for complex geometric shapes, streamlining the process and. The all-in-one digital sculpting solution Designed for the pursuit of art. UV Master is powered by an unwrap algorithm which keeps texture distortions to a minimum. It can create new UV mapping automatically, with guidance for.
Share: